
Hello everyone and welcome back to the Circular videos. Today I’m going to take you through how to create a poll for your community members to interact with.
Creating the Poll
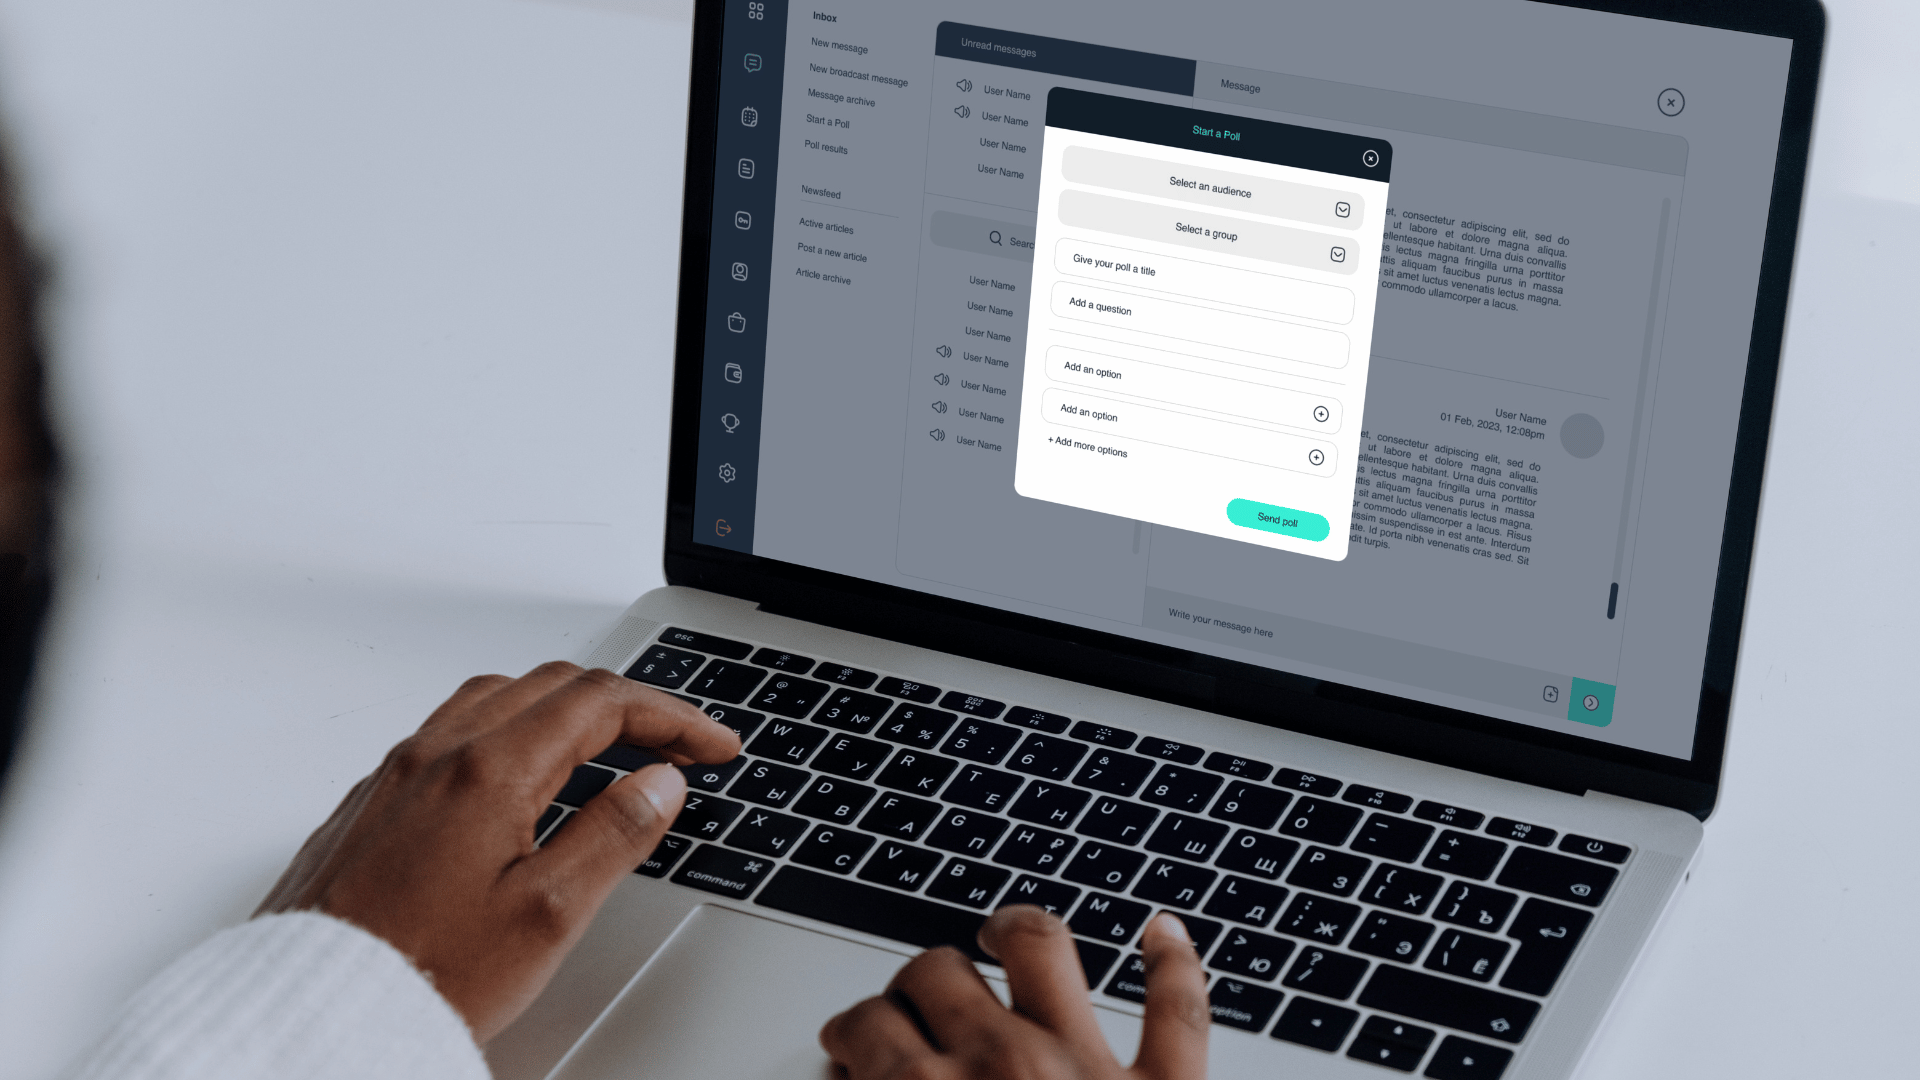
1. Log In and Navigate to the Poll Creation Section
– First, log into the portal.
– From the dashboard, navigate to the communication button on the left-hand side.
– Scroll down the list on the left to find and select “Start a Poll.”
2. Benefits of Using Polls
– Polls are a fantastic tool for getting audience insights and understanding your community better.
– This is especially useful for larger communities (e.g., 50+ members) to know their preferences and how to engage them more effectively.
3. Selecting the Audience
– You can send the poll to everyone in your community (by selecting “all”) or to a specific group.
– Remember, you need to pre-create the group you want to allocate before selecting it in the drop-down list. This can be done by navigating to the community button and creating a custom group.
4. Creating the Poll
– Give your poll a title. For example, “Office Party Locations.”
– Ask your question, such as “Where should the office party be hosted this year?”
– Provide multiple choice options like “At the office,” “The boardroom,” etc.
5. Publishing the Poll
– Once the poll is created and successfully submitted, it becomes instantly available inside the application.
– Community members will receive a push notification to participate.
Viewing Poll Results
1. Voting and Real-Time Updates
– Members can immediately vote by tapping on the push notification.
– After casting their votes, they can see the results in real time.
2. Accessing Poll Results
– Navigate to the poll results section.
3. Detailed Results and Exporting Data
– This information can be exported as a CSV file for further analysis.
We hope you find this polling feature as useful as we do. It’s a great way to engage with your community and gather valuable insights. If you have any questions, feel free to reach out. Have a great day!